|
|
Click the images below to see them full size.
|
RIGID
MOUNTING WITHOUT WIRES In the MiniTraps Demo Video we show MiniTraps being mounted to a door in RealTraps partner Doug Ferrara's home studio. In that video we used picture wire with a cardboard tube spacer, but we've since devised a better, more secure, method as described in this short article. Note that these instructions apply for MondoTraps and MicroTraps as well as MiniTraps, and can also be used to mount your traps rigidly to a door with an air gap. Even when panels are placed flat on a wall, there are still two big advantages to having an air gap behind them. One is that the gap extends the absorption a full octave lower. Another is that sound striking the wall at an angle near the panel will be reflected into the rear to be absorbed. So a bass trap that's 2 by 4 feet behaves as if it were more like 3 by 5 feet. If you plan to mount a trap on a door, be sure your door will support the weight! MicroTraps weigh only 8 pounds, so they can be mounted on pretty much any door. But MiniTraps weigh 13 pounds, and MondoTraps weigh 17 pounds, so it's best to mount these heavier traps on a solid core door having three hinges. The post bases suspend the panels 3 inches off the wall, which increases their absorption as described above. The steps below use three wall anchors and three 3-inch post bases. If you're mounting the trap on a door you'll instead use wood screws. All of these items are commonly available at most hardware stores, or you can buy them from us as a kit for $15 per trap. For traps mounted horizontally or on a ceiling, four post bases are required ($20 per kit).
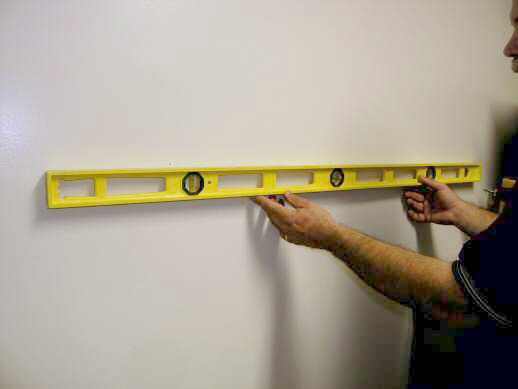
The first step it to determine where to place the wall anchors that hold the post bases. Referring to Figure 1 at left, you'll install one wall anchor for each of the three post bases. We suggest you measure carefully, and also use a level as shown above to ensure the trap will hang straight. Then attach the post base as shown in Figure 2, and tighten the screw until it's reasonably secure. It's okay if the post bases are not perfectly tight because the trap will keep them straight once it's in place. Once all three post bases are attached, lower the trap gently onto the post bases. Each post base will slip snugly between the mounting bars on the rear of the trap and the fabric.
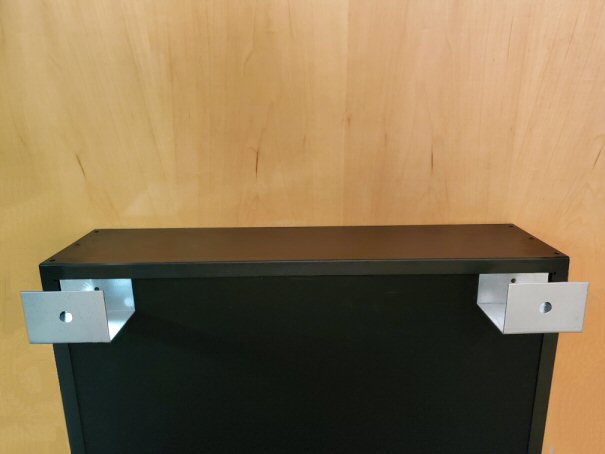
It's also possible to use post bases with RealTraps that do not include the rear mounting bar. Panels sold as Modular Kits or MiniGobos do not include cross bars. So instead, the post bases will tuck under the 3/4-inch bezel that frames the front and rear of every panel as shown in the photo below. Two will slip under the bezel at top, and one more will go (upside down) at the bottom. Post bases are made from springy steel. So after the panel is dropped onto the top two post bases, reach behind the panel, flex the bottom post base up slightly, and slip it behind the bottom bezel.
|
|
Entire contents
of this site Copyright © 2004- by RealTraps, LLC. All rights reserved. |
)
)
)
)
)
)
)
)
)